If you want a safe and easy way to install Windows 11, Rufus is one of the easiest programs to utilize. The majority of users face problems such as TPM 2.0 restrictions, Secure Boot requirements, or older hardware that is incapable of meeting Microsoft’s installation instructions. Rufus bypasses such issues since it enables you to bypass limitations and make an appropriate installation USB. In this Rufus Windows 11 tutorial, we will take you through step by step how to use Rufus to install Windows 11, establish proper settings, and avoid common problems when installing.
Why Use Rufus for Windows 11 Installation?
Rufus is a free tool with which you can make Windows 11 bootable USB Rufus drives. While the official Media Creation Tool has fewer options, Rufus has more such as avoiding TPM 2.0 and Secure Boot verification. This makes it possible to install Windows 11 even on older computers. You can either use GPT or MBR format depending on your computer, which proves to be helpful in case you are not certain about what Rufus GPT or MBR for Windows 11 is. As it is extremely fast and adaptable, Rufus stands out from other software. It also provides users with options to test Rufus bypass TPM 2.0 with ease.
Prerequisites for Using Rufus
Before continuing with this Rufus Windows 11 tutorial, make sure you have the following items:
- The latest Rufus software (download from its official website).
- A Windows 11 ISO file (downloading from Microsoft’s official website).
- A USB drive of at least 16GB capacity.
- Back up your data since the USB will be formatted.
Backup Your Data
Before creating a bootable Windows 11 USB, it is crucial to back up your important files. Since the USB will be formatted, any existing data will be lost. Using a reliable tool like 4DDiG Partition Manager makes the process easier, allowing you to secure your data before installation. This ensures you avoid accidental data loss and manage your storage efficiently.
Key Features of 4DDiG Partition Manager for Backup:
- Easy file and partition backup before installation
- Secure cloning of entire disks or partitions
- User-friendly interface with guided steps
- Quick file transfer to external drives
- Reliable data protection with minimal risk
Steps to use 4DiGG Partition Manager to back up Data
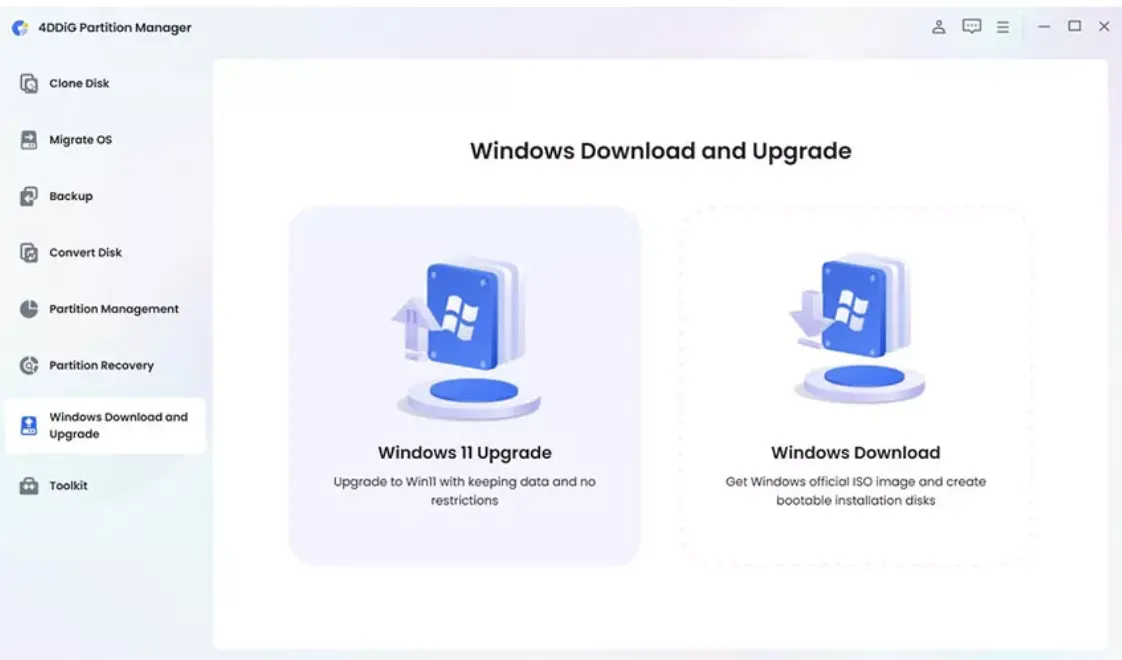
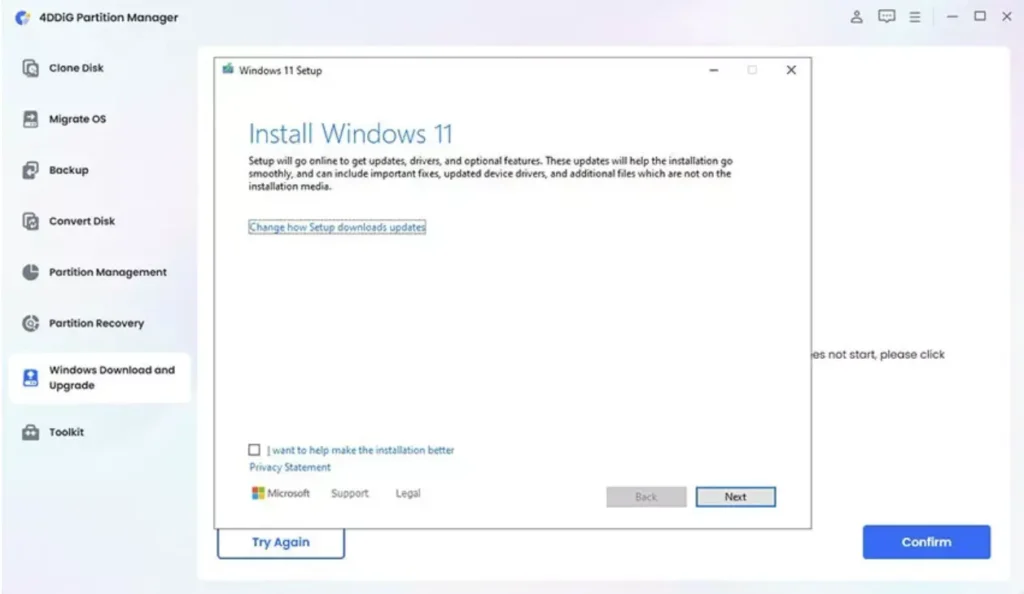
Step 1: Download and open 4DDiG Partition Manager. Go to the Windows Download and Upgrade section, then select Windows 11 Upgrade from the options.
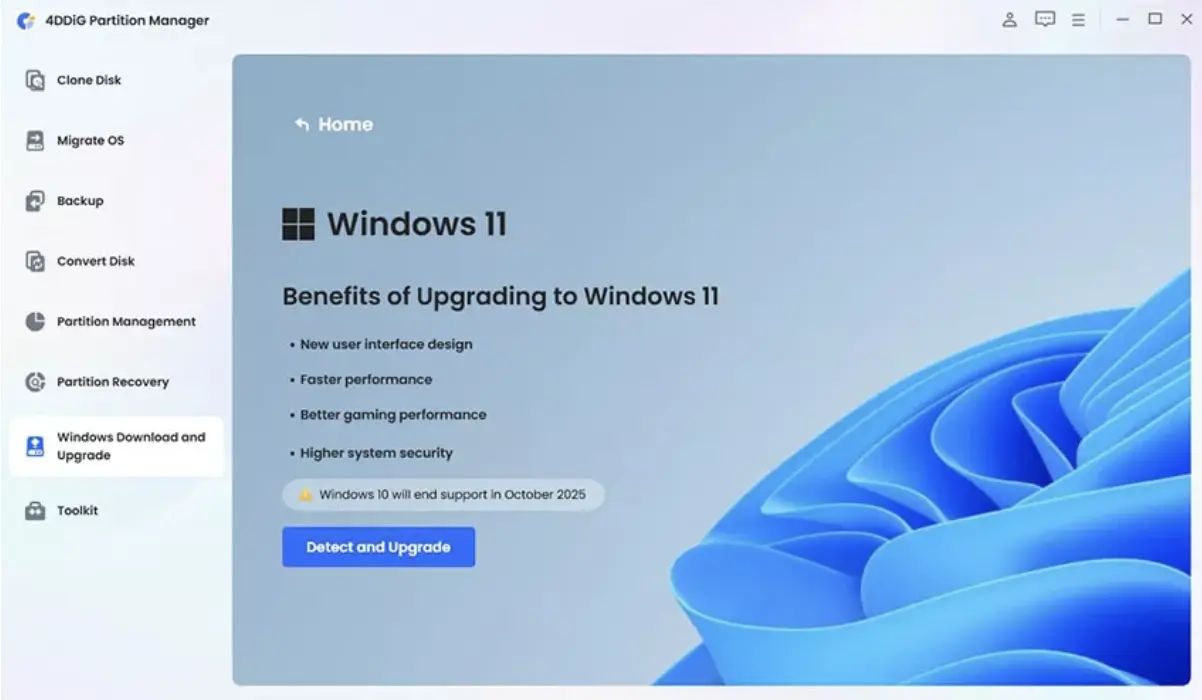
Step 2: Check if your PC meets the basic system requirements by clicking the Detect and Upgrade button.
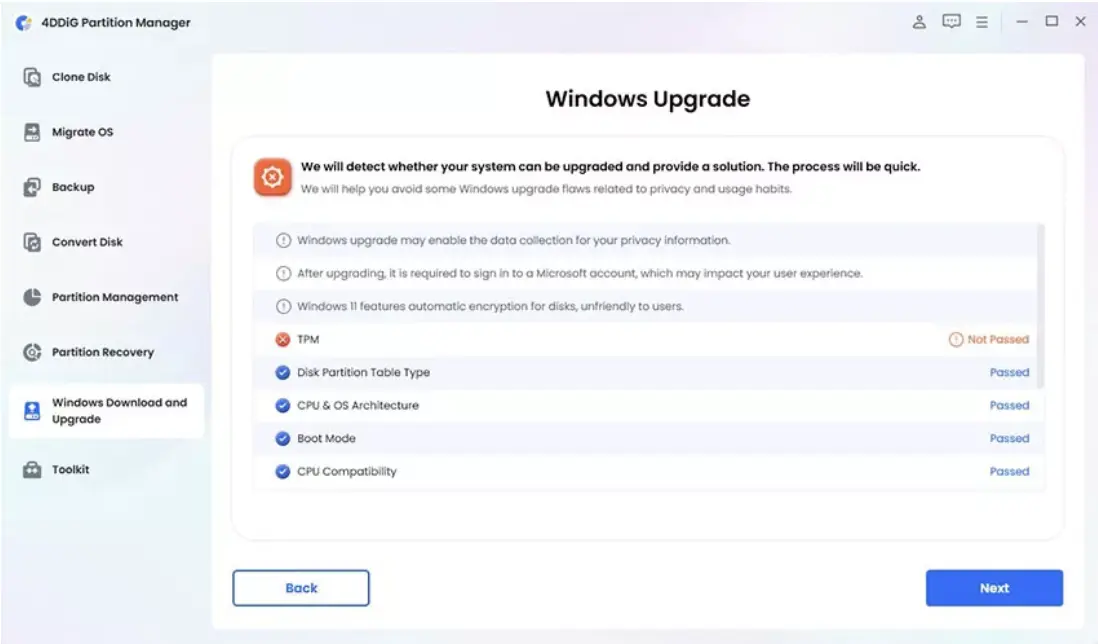
Step 3: You’ll now see a report showing whether your computer supports Windows 11. If it doesn’t meet the requirements (like TPM 2.0 or CPU), just click Next to continue and bypass the checks.
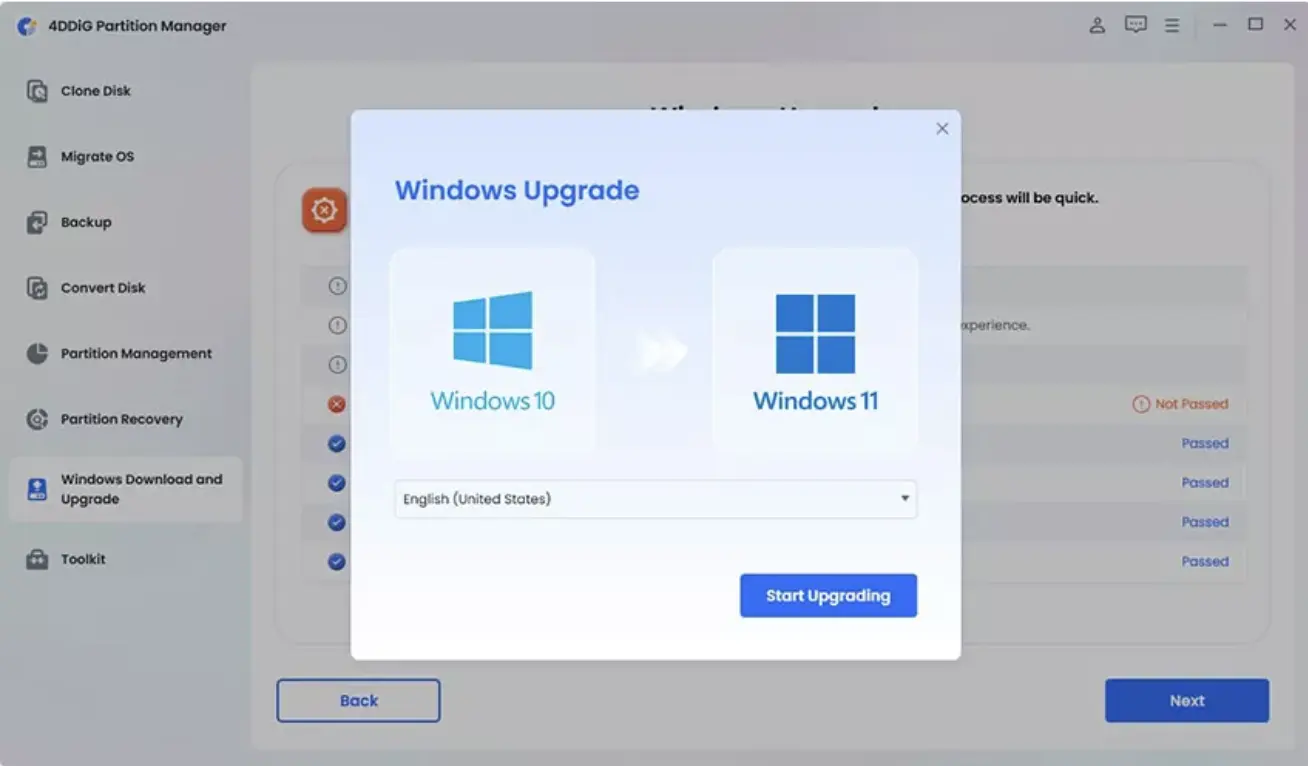
Step 4: Select your preferred language and region, then click Start Upgrading. When asked for confirmation, click Sure to proceed with the upgrade.
Step 5: The tool will now bypass windows 11 CPU requirements. This may take a few minutes wait until the process finishes.

Step-by-Step Guide to Create a Bootable USB with Rufus
Following is a step-by-step guide on how to use Rufus to install windows 11.
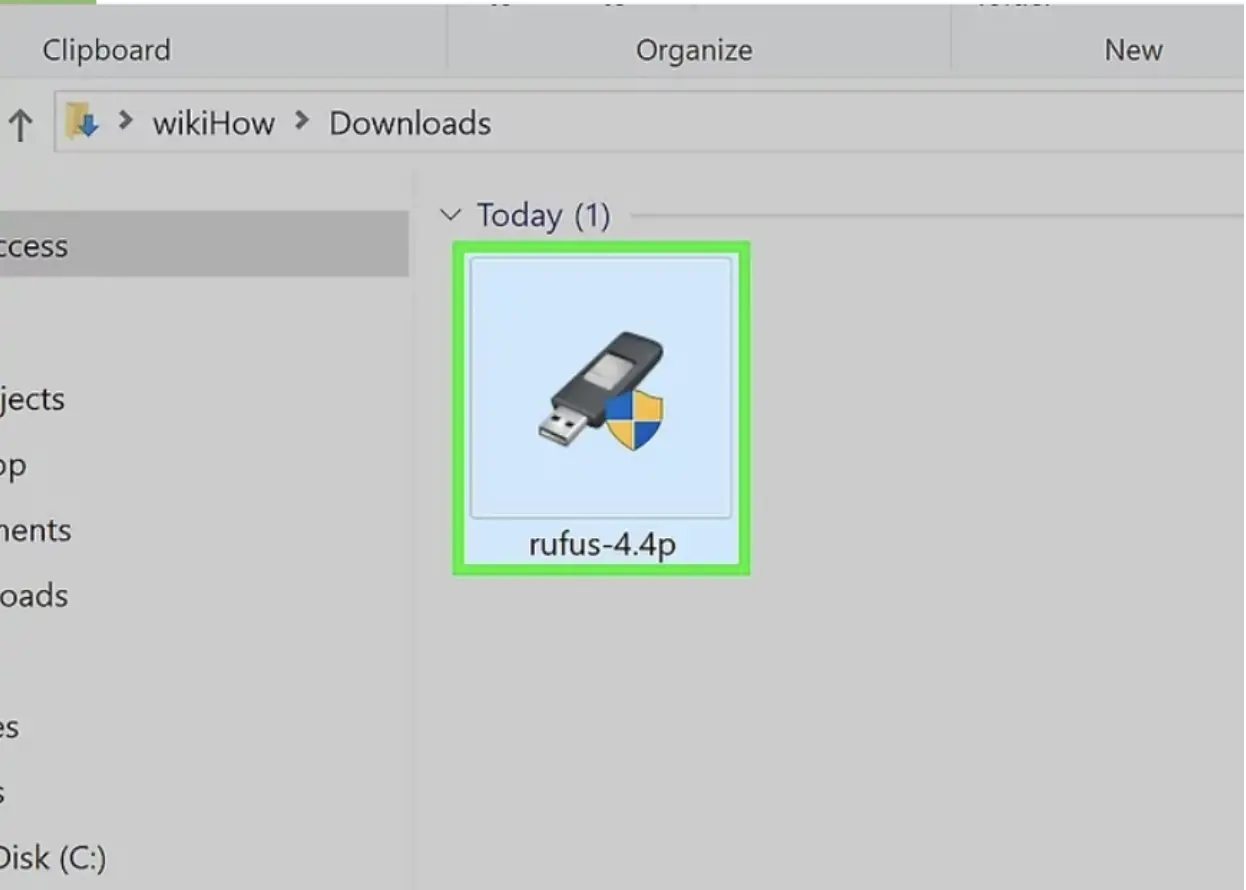
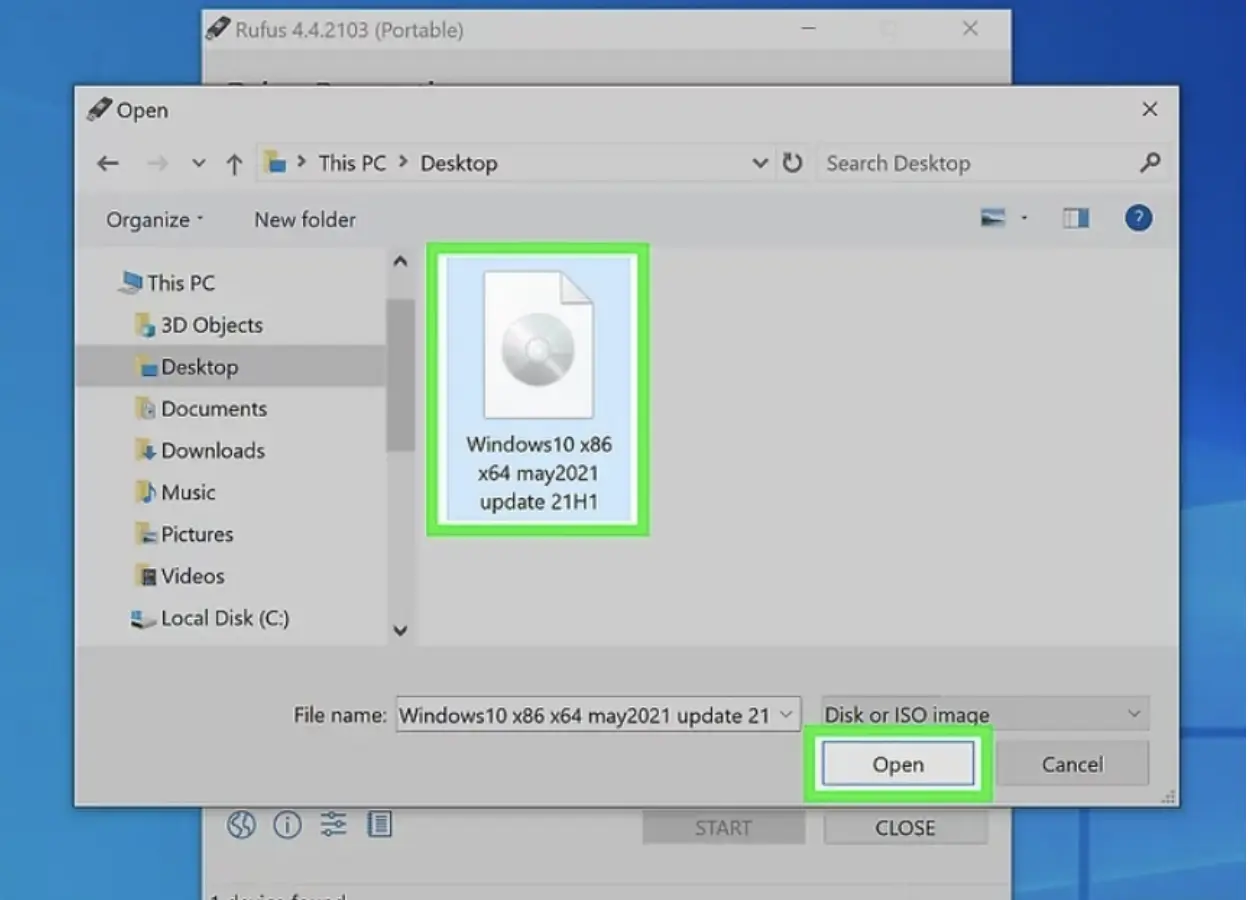
Step 1: Download Rufus and Windows 11 ISO
Go to the website of Rufus and download the current version. Then, go to the webpage of Microsoft in order to acquire the Windows 11 ISO. They are both free.
Step 2: Launch Rufus and Select USB Drive
Insert your USB drive. Launch Rufus and see the “Device” field. Make sure that you select the correct USB, since data will be lost when you continue.
Step 3: Configure Settings
This is a very important step.
- Partition Scheme: Choose GPT if your machine is UEFI, or MBR if you are using Legacy BIOS. Both users search for Rufus GPT or MBR Windows 11 and this is the rule of thumb to be used.
- File System: Choose NTFS.
- Rufus Settings for Windows 11: Check the box that says “Remove requirement for TPM 2.0 and Secure Boot.” This allows you to utilize Rufus bypass TPM 2.0 and install on unsupported computers.
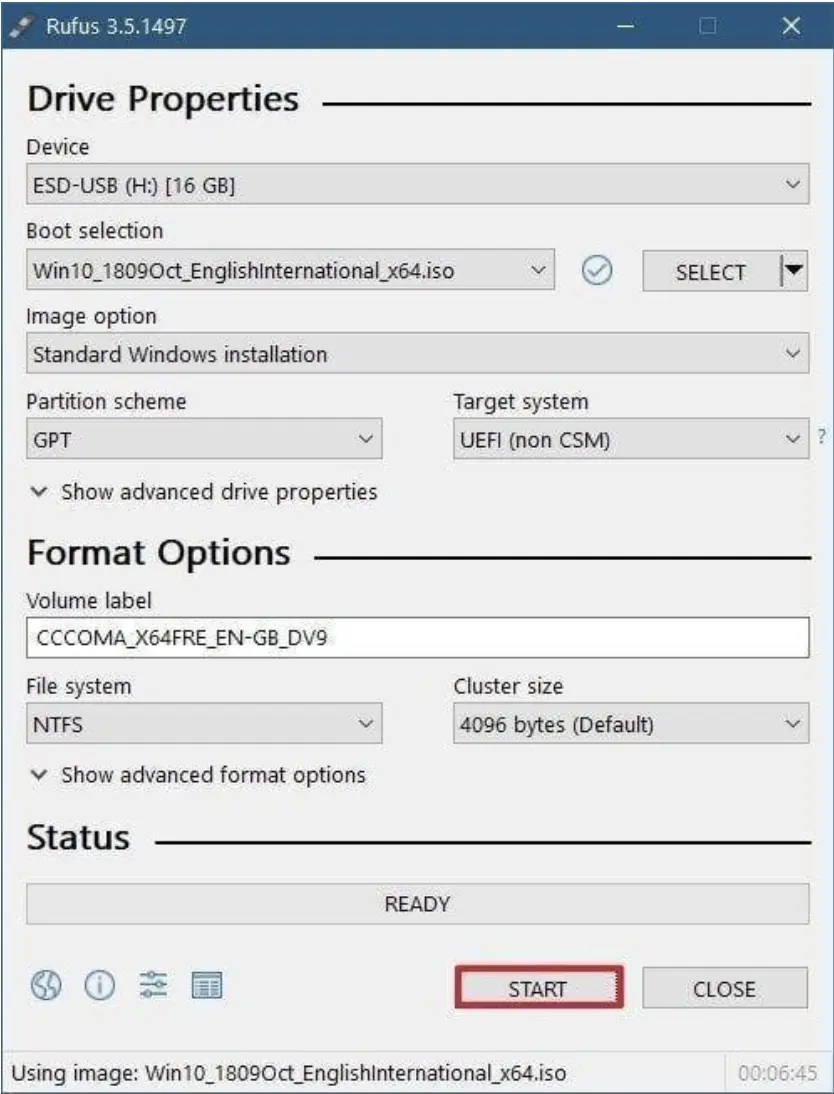
Step 4: Start the Process
Tap “Start.” Rufus will notify you that the USB contents will be erased. Consent, and it will create the bootable USB.
Step 5: Boot from USB and Install Windows 11
Restart your computer, enter BIOS/UEFI, and set the boot priority to USB first in reverse. Upon boot, follow the on-screen prompts to install Windows 11.
Using these Rufus settings for Windows 11 will make it easy for you to create Windows 11 bootable USB Rufus drives and finish the installation.
Troubleshooting Common Rufus Issues
And occasionally things do not go right. The following are fixes for common problems in this Rufus Windows 11 tutorial:
- Rufus not detecting USB: Try using a different USB port, reinitialize the USB, or switch to a new drive.
- Boot failure: Make sure USB boot is enabled in BIOS. Double-check if you have selected GPT or MBR correctly.
- Installation errors: The ISO can be corrupted. Redownload the Windows 11 ISO from Microsoft’s website.
If your PC does not meet requirements, you can install Windows 11 without TPM by utilizing Rufus’ bypass feature. This feature makes Rufus stand out from the Media Creation Tool.
Alternative Methods to Install Windows 11
Even though Rufus is hugely popular, there are other options available. Ventoy allows you to have multiple ISOs on one USB. The Media Creation Tool is easy but will not bypass TPM, so it is restricted compared to Rufus. BalenaEtcher is also a tool but is geared toward Linux and cross-platform use. Between Rufus vs Media Creation Tool, Rufus is perfect when you are trying to install Windows 11 on older systems or need Rufus bypass TPM 2.0 functionality. However, if you just want a simple official setup, the Media Creation Tool is acceptable.
FAQ Section
Q1: Can I use Rufus to install Windows 11 without TPM?
Yes, Rufus has the capability of bypassing TPM and Secure Boot authentication. This allows you to install Windows 11 without TPM.
Q2: Is Rufus safe to use?
Yes, Rufus is safe and trustworthy. Download only from its official website to avoid malware.
Q3: How to repair partitions after installation?
If your partitions are not set up correctly, software like 4DDiG Partition Manager can simply repair or resize them.
Final Thoughts
By now, you should have a clear idea of how to use Rufus to install Windows 11 on your computer. Rufus streamlines the process by offering you options for bypassing TPM 2.0, tweaking Rufus settings for Windows 11, and deciding between Rufus GPT or MBR for Windows 11 depending on your machine. Rufus is more useful than the likes of the Media Creation Tool, especially if you’re running Windows 11 without TPM. Regardless of whether you need to create Windows 11 bootable USB Rufus or solve problems like Rufus not detecting USB, this tutorial will have it all.
- About the Author
- Latest Posts
Our Editorial Team are writers and experts in their field. Their views and opinions may not always be the views of Wellbeing Magazine. If you are under the direction of medical supervision please speak to your doctor or therapist before following the advice and recommendations in these articles.